How to create a bootable USB installer for OS X Yosemite

It’s great that Apple releases new versions of Mac OS X for free, but there the problem becomes when you have to do a fresh install. You can’t go into their stores to buy a copy or do the same thing online. Upgrading is a breeze through their online App Store, but there is still a “glitch” when it comes to installing their OS onto a blank hard drive.

It’s gotten to the point where I have had to do a number of these installs, so I’m reposting the directions for how I prefer to do this process for my own records.

These directions come from Macworld.com:

Starting with Mavericks, hidden inside the OS X installer is a Unix program called createinstallmedia, provided by Apple specifically for creating a bootable installer drive. If you’re comfortable using Terminal, createinstallmedia is a relatively simple tool to use.

As mentioned above, the createinstallmedia tool works only in Lion, Mountain Lion, Mavericks, or Yosemite—you can’t create an installer drive this way while booted into Snow Leopard. If you need to create a Yosemite beta install drive while booted into Snow Leopard, you should use the Disk Utility instructions, below.

Here are the required steps:

  1. Connect to your Mac a properly formatted 8GB (or larger) drive, and rename the drive Untitled. (The Terminal command used here assumes the drive is named Untitled.) Also, make sure the Yosemite installer, called Install OS X Yosemite.app, is in its default location in your main Applications folder (/Applications). This means that if you moved it before installing Yosemite, you need to move it back before making your installer disk.
  2. Select the text of this Terminal command and copy it:
    sudo /Applications/Install\ OS\ X\ Yosemite.app/Contents/Resources/createinstallmedia --volume /Volumes/Untitled --applicationpath /Applications/Install\ OS\ X\ Yosemite.app --nointeraction
  3. Launch Terminal (in /Applications/Utilities).
  4. Warning: This step will erase the destination drive or partition, so make sure that it doesn’t contain any valuable data. Paste the copied command into Terminal and press Return.
  5. Type your admin-level account password when prompted, and then press Return.
  6. The Terminal window displays the progress of the process, in a very Terminal sort of way, by displaying a textual representation of a progress bar: Erasing Disk: 0%… 10 percent…20 percent… and so on. The program then tells you it’s copying the installer files, making the disk bootable, and copying boot files. Wait until you see the text “Copy Complete. Done.”, which could take as long as 20 or 30 minutes, depending on how fast your Mac can copy data to your destination drive.

You now have a bootable Yosemite install drive. If you like, you can rename the drive from its default name of Install OS X Yosemite, though I think it’s kind of a catchy name.

Once you’ve made the USB installer, reboot your Mac with just the USB drive, keyboard, and mouse connected while holding down the Option-key to choose the USB installer from the Startup Manager when it launches.

I prefer to work in Terminal for functions like this. If you go to the linked article on MacWorld, there are some GUI friendly ways to do the same thing.

Tips & Tools: Spyware removal software for Windows XP users

The main reason that I am making this post is for my sister-in-law’s mother, but I figure that it’s worth mentioning in a full out post. Since I’m back in the technical support realm of things in the world of broadcasting, I’ve gone back to my tricks of the trade when working in the Windows XP world, and this certainly works for those running Windows 2000 and ME.

No matter what websites you are or are not surfing while on a PC running Windows, spyware[wiki] lurks around every corner. You don’t have to download anything for it to find its way onto your machine, although that is one of numerous ways that it can get onto your machine. It can come from cookies, holes in the programming of your browser, or a variety of other ways that hackers are constantly trying to exploit.

When it starts getting painful to operate your computer and rebooting it just doesn’t fix the problem, try running the following two programs in conjunction with each other. They will scan and, hopefully, remove these malicious pieces of software from your computer. The best part is that they are completely free.

  • Spybot Search and Destroy
    If you are doing this for the first time, start with this program. Download and follow the directions. Don’t forget to download the latest virus definitions and immunize your computer against future problems when Spybot asks for it. A full scan with this program can take a while, and you might have to reboot your machine and cycle through with this program a few times before it can successfully eliminate any issues you might have.
  • Ad-Aware
    This is what I typically run second after already running a Spybot scan. When you first download Ad-Aware, don’t get confused between having to pay for the pro version of the software compared to the free version. Just cancel out of the window when it asks you to pay for the program. Once again, follow the directions and download the most up to date definitions so it knows what to look for and possibly remove from your computer. When you go to scan your computer, do the full scan, as this will look deep into your computer’s hard drive for anything that shouldn’t be there.

Once again, if this is your first time ever doing this on your computer, repeat this process a second time. I recommend this out of experience because it can save you from having to completely reinstall Windows onto your computer. However, if you still have problems, the issue might be too deep for this to be your solution.

In my time working in the I.T. realm of things, I can say that these problems typically come from those using Internet Explorer. There are points where you can’t get away from the browser, but if you want an extra line of defense from this happening, get Firefox and make that your default browser. It works extremely well, is less vulnerable to things like spyware, thrives in an open source community, has a strong user base, is very versatile, and is the browser that I use on both Mac and PC platforms. The learning curve isn’t that bad, but there are a variety of add-ons you can put into Firefox to enhance your use.

Just to give you a first hand account of how these tools have been effective for me, I ran into an issue with a machine where the user complained that it had become so sluggish that they couldn’t do anything with it, including shutting it down. Running Spybot, it found two issues and removed them. Never running Ad-Aware on the machine before, the full scan found 1,200 various files that were not supposed to be there. Repeated the process without finding anything a second time and turned the computer back over to the user. There haven’t been any issues since, but repeating the scans in the future will help keep the machine healthy. Well, at least until the next problem, such as spilling coffee in the keyboard, occurs.

I’m sure there might be other things out there that work well, so I invite readers to add them into the comments. And hopefully Carol will be able to fix the issues she was having with her PC.

Two screens are better than one

My dad had an epiphany while he was visiting us in Vancouver back in April. Instead of one really huge monitor, you can get a lot more out of having two. When I told him about having three, I think that kinda blew his mind.

Chris Pirillo, who apparently I am a lookalike of, posted about this today, so I sent it on to Dad. He replies, “I already have one.”

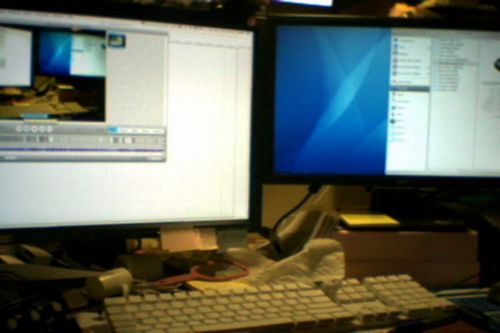
Dad’s Duel Monitor Setup

“There is no way I’ll go back to the single monitor on my work setup. It is too nice; too productive; too fun; and a new world all together.”

Designing electronics like he does, it makes a whole lot of sense, eh?

Why won’t the speakers work on my PowerBook?

This has been a problem of mine for the past year. The internal speakers on my PowerBook G4 just stopped working one day, but the headphone jack still operates without a problem. There is the fact that this thing is nearly four years old and the first generation of the 17-inch models. You would think that they just broke and wouldn’t want to put out audio because its senior citizen status when it comes to the world of computers. It’s not the case, and long story short, it has to be a software problem.

I’ve done numerous things over the past few days. Actually, I’ve tried a few various times, mostly whenever I have the patience and courage to try some potential solutions. Still nothing works.

I’ve basically tried everything that I could find here with no success. You can even find a post there by yours truly, begging for answers.

My pursuit will continue, but I doubt that I’ll be successful. Dealing with a sinus thing over the past three days, I’ve given it a good try. I know, get something new. Wish it was that easy. This baby needs to last me just a little while longer.

Flaw in Mac OS X; proof-of-concept code exploit

Worth noting and passing on to other MacOS users.

A security researcher has published attack code for an unpatched flaw in Mac OS X, the latest vulnerability in the “Month of Kernel Bugs” campaign.

The proof-of-concept code exploits a security hole in the way Apple Computer’s operating system handles disk image files, the researcher wrote Monday on a blog devoted to the campaign, which promises to reveal details of a new flaw in low-level software every day this month.

“Mac OS X com.apple.AppleDiskImageController fails to properly handle corrupted DMG (disk image) image structures, leading to an exploitable memory corruption condition with potential kernel-mode arbitrary code execution by unprivileged users,” wrote the researcher, who goes by the initials “LMH.”

The vulnerability could be exploited remotely, as Apple’s Safari Web browser loads DMG files from external sources, such as one found while visiting an URL, LMH wrote. That could let an outsider compromise a system. [cnet]

To put it into simple terms, there is a risk, but you have to actively download a file from the Internet for anything “bad” to happen. Nothing happens from just having your computer connected to a network. I’m sure Apple will attempt to fix this in the very near future.

Just be smart with what you are doing. Don’t download anything you can’t be really sure of. If a website that you visit automatically has a file start downloading onto your computer, stop it as soon as you can. If it gets downloaded anyway, do not allow it to expand or activate. Cancel anything your browser asks, and do not double click on the file itself. Delete it as soon as possible.

This is the MacBook Pro that I was looking for

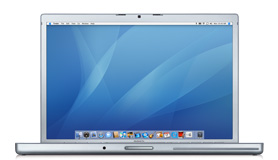
Apple MacBook Pro 15-inchActually, I’m really torn. I love my 17″ Powerbook G4, but the processor is getting closer and closer to the low end of things. I’m probably on borrowed time until the hard drive starts to give me fits, so if I’m going to replace the whole thing, then I’m going to stick with the notebook way of life.

Just today, Apple launched some new models of the MacBook Pro that I am very interested in getting my hands on. The big thing for me is FireWire[wiki] 800. Processor speed, graphics, and memory kind of come second. However, the specs on these suckers are looking sweet.

Apple today announced that its entire MacBook(TM) Pro line of notebooks now includes the new Intel Core 2 Duo processor and delivers performance that is up to 39 percent faster than the previous generation. All MacBook Pro models now offer double the memory and greater storage capacity than the previous generation, as well as a FireWire(R) 800 port for connecting to high-speed peripherals. [macrumors]

When you go with a laptop, your hard drive is never going to have enough space on it for you. As space gets cramped, much like on mine, you need to think external. At the same time, the speed of your hard drive is critical, and very rarely do you get anything above 5200 RPMs. Why? Heat and power consumption. It’s all correlational.

With the amount of audio editing that I like to do, I have to have my external, 200GB hard drive. FireWire 800 makes it really easy to make backups and copy files really quick like, but the best part is actually doing all my recording and editing to it. Before this, the fan on my Powerbook would spin quite a bit, not to mention programs hiccuping from time to time because the internal hard drive couldn’t be accessed quick enough. The software was outdoing the hardware, but life is better when you work on the external and allow the processor more room to breathe.

Now that FireWire 800 is apart of all MacBook Pro models, it has me thinking about moving away from the large screen screen world of Apple notebooks. I know that the 15″ is not that much smaller than the 17″, but it can start to matter when you think about simple portability. Bags and protective cases for large laptops are a bit of a specialty, not to mention that you can forget how big that laptop in your bag really is from time to time. The door can and will hit you on the way out if you forget that it’s there.

Speeding up Firefox

When I used to do I.T. for WSUI, I pushed for people to use Firefox as their default browser on their PC. Fellow tech support monkeys can understand that for obvious reasons.

I just recalled this tip that I caught wind of about a year or so ago. This is a really great way to speed up Firefox, and it doesn’t require you to download anything to do it. This mostly applies to those folks on broadband, so if you’re on dial-up, this isn’t for you.

  1. Type “about:config” into the address bar and hit return. Scroll down and look for the following entries:
    • network.http.pipelining
    • network.http.proxy.pipelining
    • network.http.pipelining.maxrequests
  2. Normally the browser will make one request to a web page at a time. When you enable pipelining it will make several at once, which really speeds up page loading.
  3. Alter the entries as follows:
    • Set “network.http.pipelining” to “true
    • Set “network.http.proxy.pipelining” to “true
    • Set “network.http.pipelining.maxrequests” to some number like 30. This means it will make 30 requests at once.
  4. Lastly, right-click anywhere and select “New” -> “Integer“.
  5. Name it “nglayout.initialpaint.delay” and set its value to “0“. This value is the amount of time the browser waits before it acts on information it receives.
  6. Restart Firefox.  You can follow steps 1 through 5 to be sure that your changes saved correctly.
    • Note: You might have to make these settings changes everytime Firefox is updated.

This works for the Mac version, too. Logging into WordPress is a snap, and browsing just got a whole lot faster. Once again, another reason I’m a happy switcher to Firefox.

Use a bookmark to resize your browser window

I found this tip via Macworld a while ago, but it was meant for use in Safari. However, in making my switch to Firefox, this was a feature that made the jump all the more interesting because it works in this browser as well. Here’s how it breaks down from Macworld.

Launch Safari (or your favorite browser) and create a new bookmark. Most browsers will require that you bookmark a specific site. In Safari, open a site and then choose Bookmarks: Add Bookmark. Give the bookmark a name that will help you remember the screen size, such as 800×600 or 1024×768. Next, edit the address of the bookmark—in Safari, go to Bookmarks: Show All Bookmarks and navigate to your newly created bookmark. Change the Address portion of the bookmark to:

javascript:self .moveTo(0,0);self.resizeTo(800,600);

Open any page in Safari and select the bookmark. You’ll see that page in an 800-by-600-pixel browser window. You can then duplicate this bookmark and create other sizes as needed; just change the name and the relevant code. When you’re done, move your new bookmarks to a convenient location; then click on them when you want to test your pages at different resolutions. [macworld]

I like to have three of these bookmarks in my toolbar. From small, medium, to large, it gets very useful. I’ve even gone as far as making them slightly button-like, naming them “-“, “+”, and “++”. You can minimize and maximize windows all you want, but to make it quick and simple, just hit your bookmark and you’re done.

This might not be too handy for those folks out there that don’t have a lot of real estate on their monitor. If you run a monitor at the screen size of 1024-by-768, then you might not see the advantage. I can’t be sure if this works in the world of PC’s, but it stands to reason that it should. It’s great for previewing how websites you are working on look, but I just like it for the simple reason of keeping everything on my screen in a more controlled state of chaos.

Hacking a MacBook via Wi-Fi

Attention MacBook owners: you might want to pay attention to this.

LAS VEGAS–Flaws in the software that runs wireless-networking hardware could let an attacker break into a PC over Wi-Fi, security researchers warned Wednesday.

An attacker could gain complete control over a laptop by sending malformed network traffic to a vulnerable computer, David Maynor, a senior researcher at security service provider SecureWorks, said in a presentation at the Black Hat security event here.

Maynor, along with researcher Johnny Cache, showed a video of a successful attack on a MacBook, made by Apple Computer. However, the attack is possible also on other computers, both laptops and desktops, and not just MacBooks, the researchers said. [cnet]

Of course, this isn’t just limited to MacBooks, but the idea of Apple products being safe from hackers is not as true as the commercials may lead on. The article continues to go on to say that this isn’t a wide-spread issue, but it is something to be concerned about. The important thing is for developers to take this into consideration and cut it off before these vulnerabilities become easy to exploit.

Still feel uneasy about your machine getting hacked wirelessly? Here’s good advice from the article.

Consumers should be streetwise when using their laptop by not connecting to networks they aren’t sure they can trust and by disabling the wireless radio when it is not needed, Maynor said. “There is no need to run out and rip your wireless card out of your laptop, but you should take precautions,” he said. [cnet]

The other thing to note is that this comes from flaws within drivers. These are easy to remedy through updates. It would be a good idea to be paying attention over the next few months to see if there are warnings and updates issued for the stuff you are using.

Getting bit by not managing my data

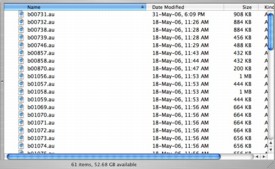
So...  much...  audio...The last few days, I’ve found my mind swimming through the issue of managing the data that rests on my laptop and external hard drive. This goes beyond the basic backing up gigs of junk in the event of catastrophe. I’m pretty good about staying on top of such things.

What I’m talking about is the simplicity of keeping track of everything, where it is, and how much space it’s taking up. I have so much audio sitting around, it’s getting nuts. It doesn’t help that I come from the radio mentality of not wanting to delete anything.

Back at WSUI, we archived so much onto CDs, it’s not funny. Stacks and stacks of blank CDRs would turn into piles of archived programs and interviews. You do it for the sake of history and yourself, creating evidence that you were once on the radio and hopefully good at it. Of course, those piles, no matter if it was your stuff or not, would be disowned when it came storing them. There’s probably still boxes and boxes of stuff waiting for some part-time, student employee to spend hours doing something along the lines of catergorizing everything into some sort of library.

With all of my podcast audio floating around, I’m starting to have flashbacks. Raw audio that I saved as a back up to go back to in case something went wrong during editing. Then the polished audio, edited and spliced up to my liking. Finally, exported clips of uncompressed audio. All of this eating up storage space.

You start a new project with the thought in your mind of keeping everything in check, only to work so hard on getting this new episode out that you forget about simple house cleaning. Yeah yeah, I’ll just be sure to take care of it next time… right? Wrong.

So here lies my pain of being a sucker and not managing my data better. Going through and finding the various pieces of audio, compressing them for storage, deleting the uncompressed stuff along with any program data that might have resulted from the numerous editing applications that I use, and repeat. It’s a slow, tedious process, but I put it off for far too long. Once it’s done, I’ll have gigs of storage space back and a DVD or two of archived audio.

This is a lesson to be learned for anyone that is podcasting, but can be applied to many situations. You never want to just delete a bunch of stuff to simply make some space. Archive it. You don’t know when it might become handy at some point in the future. At the same time, that’s history on your hard drive.